Altered Tool Turnabout: Creative Inspiration and Fundraising Success

Click For Summary

Discussion Overview

This thread centers around participants sharing their experiences with altering tool turnabouts for creative projects and fundraising efforts. Many contributors express enthusiasm for the craft and share personal anecdotes about their own creations and inspirations.

Discussion Character

  • Anecdotal
  • Opinion-based
  • Exploratory

Main Points Raised

  • One participant, identifying as a consultant, shared their success in altering a tool turnabout for a charity auction, which sold for $45.
  • Several participants expressed admiration for the altered tool turnabouts, with comments highlighting their cuteness and creativity.
  • One participant mentioned their lack of crafting skills but appreciated the idea and shared their own crafting experiences with other mediums.
  • Another participant suggested that altered tool turnabouts could make great gifts for teachers.
  • One participant shared a detailed description of how they altered their tool turnabout, including materials and techniques used.
  • Several users expressed a desire to try altering their own tool turnabouts after seeing others' creations.
  • One participant mentioned plans to sell altered tool turnabouts at an upcoming craft fair.
  • Another participant shared their experience of making altered tool turnabouts as Christmas gifts for family members.

Areas of Agreement / Disagreement

Views differ on crafting abilities, with some participants feeling confident in their skills while others express doubt. However, there is a general appreciation for the creativity involved in altering tool turnabouts.

Contextual Notes

Participants shared a variety of crafting experiences, focusing on personal creativity and the enjoyment of crafting as a community activity.

Who May Find This Useful

This discussion may be of interest to Pampered Chef consultants looking for creative project ideas or fundraising opportunities through crafting.

pchefkristin
Messages
376
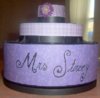
Thought I would share. My team and I had a craft day today, and a few of the gals altered their tool turnabouts. I had altered one for a Charity Auction which closed out at $45 this evening. Yeah!

Not sure how to post pictures, so thought I would share a link. It will link you to my gallery on a scrapbooking website. Let me know what you think!

http://gallery.lifetimemoments.com/showphoto.php?photo=156316&cat=500&ppuser=5580

Bet this would make a fun Clinic to offer up to customers as well!
 
Last edited:
Cute Kristin! :)
 
That's really cute. I have no delusions of ever being able to do something like that, but I like it. I can knit, crochet, weave, quilt, bead, embroider...but paper is beyond me.
 
Very cute!! Love the idea!
 
  • Thread starter
  • #5
I think it would make an awesome teacher gift ( I have pens, markers, stapler, etc in mine on my scrap table), and really, it is quite easy to make if you know how to measure and use glue.
 
Your TTA looked really really cool!! How long did it take you guys to doll it up like that?
 
Oooo, I love it. I have two tta's. One is full of pc, the other is full of scrapbooking scissors. This would be so cute for that. I may try to do that sometime to mine. Thanks!
 
Very cute!
 
That's very well done!
 
I wish I could do that! I would fix my white one up really cute. Thanks for sharing.
 
That is so pretty!
 
That looks super!
 
Adorable!!!
 
I love the tool turn about. But I can't help but notice the pictures of someone about to be baptized. Great pics! I cherish mine.
 
That's so cute - I love it!
 
That it so cute! I have been thinking about doing something to my white one when I decorate the babies room to make it match and put it to good use. And get me another black one for my kitchen, ha!
 
OMG Kristin - all of your craftiwork is simply AMAZING! I am so NOT creative - I wish I could do that stuff!
 
I would love to hear how this is done, not that I could get one to look like that in a million!
 
  • Thread starter
  • #19
This is SOOO easy to do! If you have a local scrapbook shop around, go check it out and find some pretty paper. The bottom section was covered using one 12x12 sheet of Basic Grey's BLUSH line. (Love Basic Grey!) Then I used scraps for the top two tiers.

Starting at the bottom, I cut my 12x12 page into 3 sections. Each being 3 1/4 inches. Fitting from the top of the bottom tier to the bottom above the turning mechanism. I think the second and third tiers measure 1 inch and 1 1/4 inches, but I cannot recall. Once your paper is cut, start by using some MOD PODGE glue/sealant. Available at Walmart or your local craft store. I use just a sponge brush, lightly putting mod podge on around about a third of the bottom section. CAREFULLY place the paper on and (using your Handy Scraper) get all the bubbles out of the paper. Most times, if you do end up with bubbles, I usually put it under a heat lamp which will smooth those bubbles out, or you could pin prick them as well and push the air out.
Your paper will overlap, which is ok, as long as your pattern paper is pretty uniform. Keep putting the mod podge around until your paper is on in each section. Easy peasy!

I used some die cut letters, but you could also use rub ons or stickers for your embellishing. Also, I wrapped the tops with black ribbon as well. Gluing in place with the mod podge as well. (think I also put ribbon around the bottom of the bottom tier as well.) Then embellish it any way you want. Once I have everything I want on it, I go over the paper with mod podge again, which seals it in and keeps it in good shape. If you use too much mod podge, dont worry, it will dry clear!

How long does it take? If you have never scrapbooked in a million years, it may take you an hour or so. If you are handy wtih your supplies, I would say no more than half an hour, and that is with dry time, since Mod Podge is very quick drying!

Have fun all! Would love to see your examples!

Oh Sarah, thanks... my son chose to be baptized a few months ago. 13 years old, and quite a momentous decision! I have some of those pictures up in my office as well. Makes a mommy proud doesnt it?!

Carolyn, thank you for the comment. Can you tell I will alter just about anything?! Hehehe. My girlfriend wants me to alter her a toilet seat, just because she doesnt think I can! LOL!
 
Tell Zane congratulations on his decision. I wish him all the best!
 
  • Thread starter
  • #21
Thank you Ann! It was such a glorious day. 9 others were also baptized in the lake that day. Awesome, simply and purely awesome.
 
Kristin, I love it! You did a great job!
 
I just attempted to make one for my daughter's teacher. I am not that crafty, but it was fun. I'm going to try to sell them at a craft fair next weekend. I bought 5 and people can order more if they want. Hope they sell!!
 

Attachments

  • Tool Turn About Stacey.jpg
    Tool Turn About Stacey.jpg
    28.1 KB · Views: 680
  • Thread starter
  • #24
Ahh! Cindy! That is totally adorable! GREAT job! I have a few to make up for our Curves craft show coming up too. AND my office just got a complete overhaul, so I need to cover one to match my office now too!
 
Do you use the modge podge and where did you find the letter?
 
I used Decoupage. That's what the people at Joann's Fabric told me to use. The letters are just stickers. Everything was from the scrapbooking section. I made 2 more today...one in blues and one greens. I'm starting to enjoy it!
 
  • Thread starter
  • #27
I used mod podge, first as a glue then as a sealant. The letters were die cut from a machine, but you could use stickers or rub-ons or rubber stamps if you wanted to.

Cindy, again, great job! Love that!
 
Ah! Found this thread - yeah!
 
That is really cute!! :)
 
Back
Top